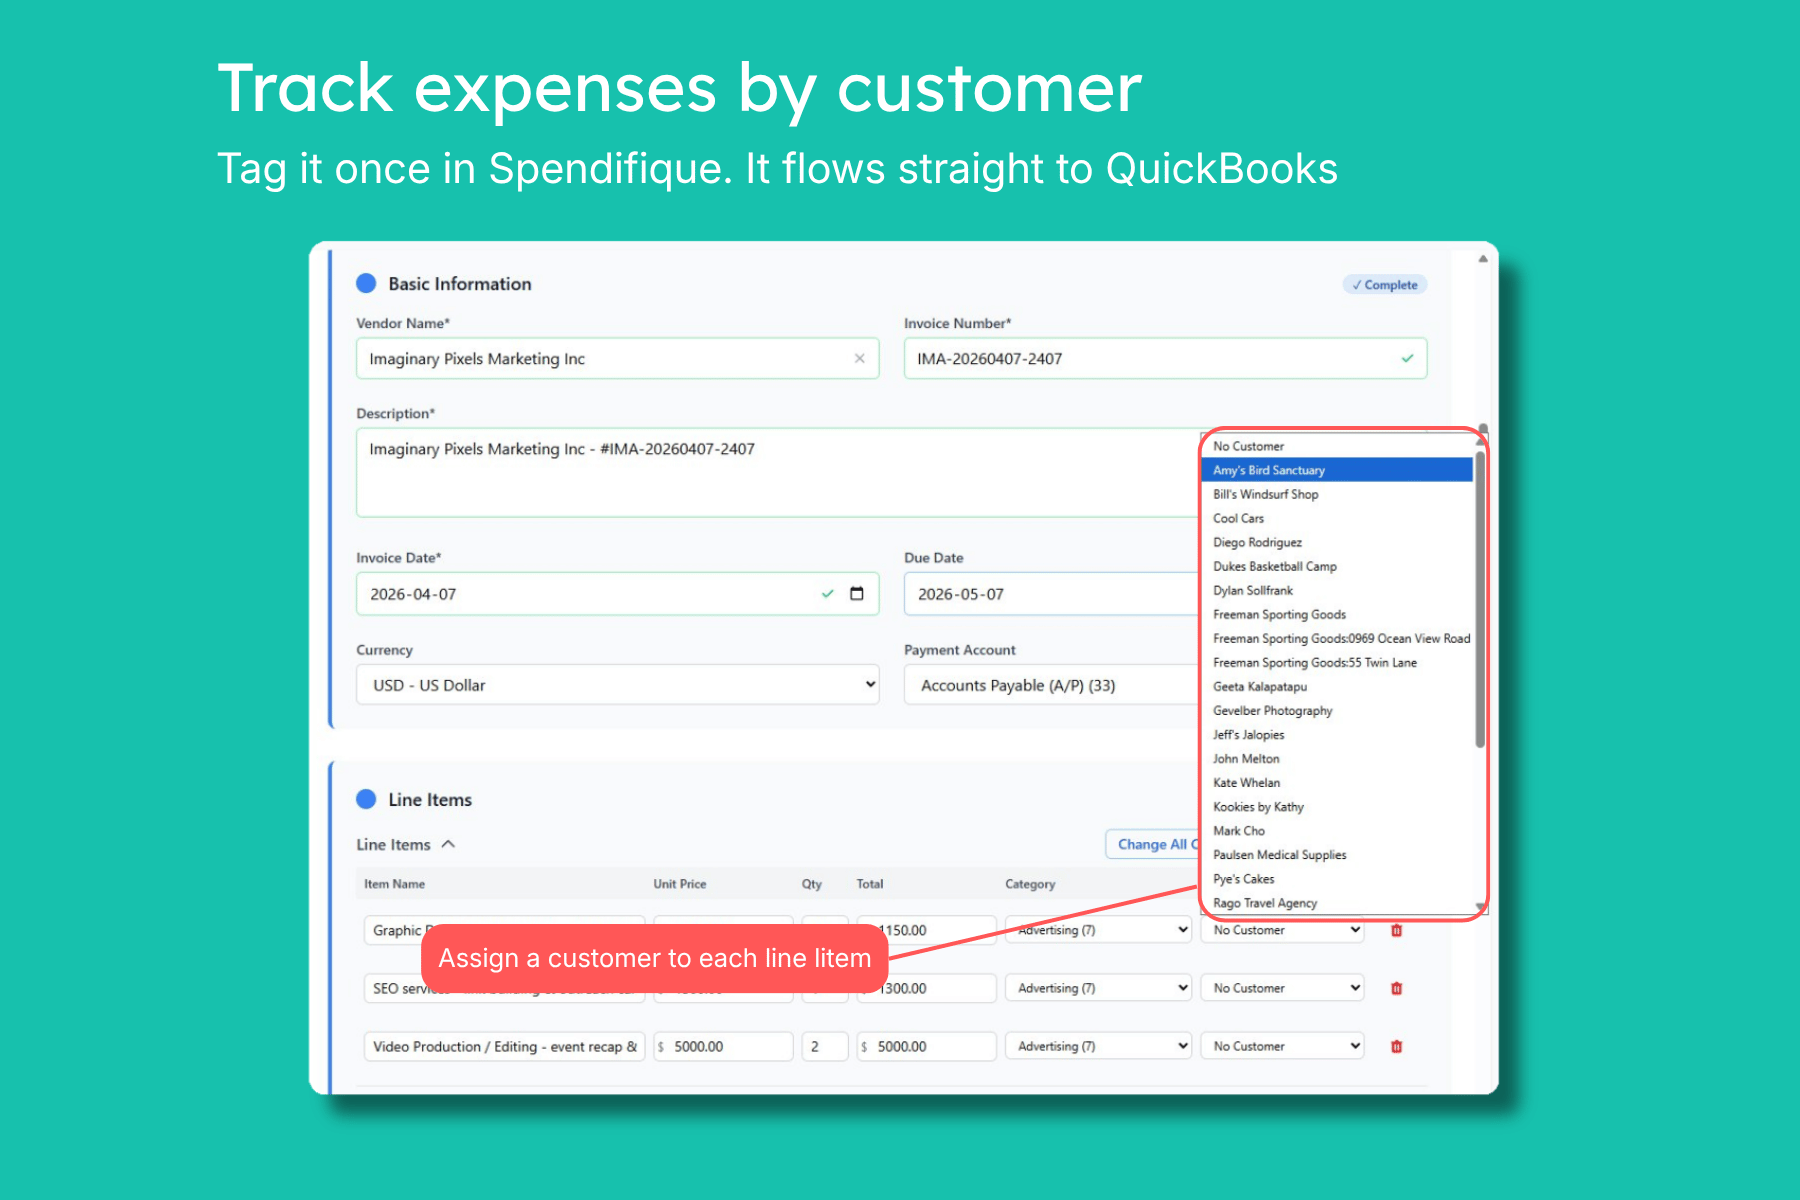
Short answer: Spendifique syncs with QuickBooks to import your customers. You can then tag any expense with the right customer, either one at a time on the Expense Details page or in batch from the Expense List. When the expense syncs to QuickBooks, the customer stays attached, so you can see true profitability for each customer and keep billable costs ready to invoice. No manual re-tagging required.
If you do customer- or project-based work (construction, agencies, consultancies, anyone who rebills costs to clients), this is the dimension your books have probably been missing.
The problem: the "who was this for?" gap
Most expense tools capture the receipt and read the vendor, date, and amount. What they tend to drop is the piece your reports actually depend on: which customer the expense was for.
So the cost gets captured, the expense syncs to QuickBooks, and then someone has to go back in at month-end and assign a customer to each transaction by hand. It's slow, it's easy to forget, and every missed tag is a billable cost you can't recover, or a profitability number that quietly lies to you.
Capturing the customer at the source, the moment the expense is entered, removes that whole cleanup step.
What it means to track expenses by customer
Assigning a customer to an expense links that cost to a specific client or job. Do it consistently and two things become possible:
- You can see real profitability per customer. Every cost you incurred for a client sits against that client, so you know whether the work actually made money once materials, subcontractors, travel, and software are counted, not just on revenue.
- You keep billable costs ready to invoice. If a cost is meant to be passed on to a client, having the customer attached from the start means it's already tied to the right place by the time it reaches QuickBooks, so nothing slips through before you bill.
Quick example: A construction company wants to know which jobs are profitable. By assigning every expense (lumber, equipment rental, subcontractor invoices, fuel) to the relevant customer, they can compare what each job brought in against what it actually cost to deliver.
Why this matters: the benefits
Know which customers and jobs actually make money. With every cost tied to a customer, the client that looked great on revenue might turn out thin on margin once the real costs are counted. That's the insight that changes which work you take on.
Stop leaking billable expenses. Reimbursable costs like travel, materials, subcontractors, and extra software seats are the easiest things to forget at invoicing time. Tag the customer when you capture the receipt and the cost is ready whenever you bill.
Kill the month-end re-tagging chore. The customer is captured once, at the source, and follows the expense into QuickBooks. No reopening transactions one at a time.
Cleaner books, faster close. Fewer manual touches means fewer miscodes and a shorter review at month-end.
Assign customers to expenses in bulk
You don't have to tag expenses one at a time. When you're catching up on a backlog, or a stack of costs all belong to the same client, you can assign a customer to multiple expenses at once. On the Expense List, select every expense you want, then apply the customer to the whole batch in a single action.
That in-bulk tagging is the difference between a five-second job and an afternoon of clicking. It's especially useful when a new project kicks off and a run of related costs all belong to the same customer, or when you're cleaning up a month of expenses before close.
Who this is for
- Construction and trades businesses doing job costing and profitability per customer
- Agencies, consultancies, and creative studios tracking margin per client
- Professional services (legal, accounting, IT, design) that rebill expenses
- Any business that needs to know what it spent serving a specific customer
If "I need to know what we actually spent on this client" sounds familiar, this is built for you.
Customer or class: which should you use?
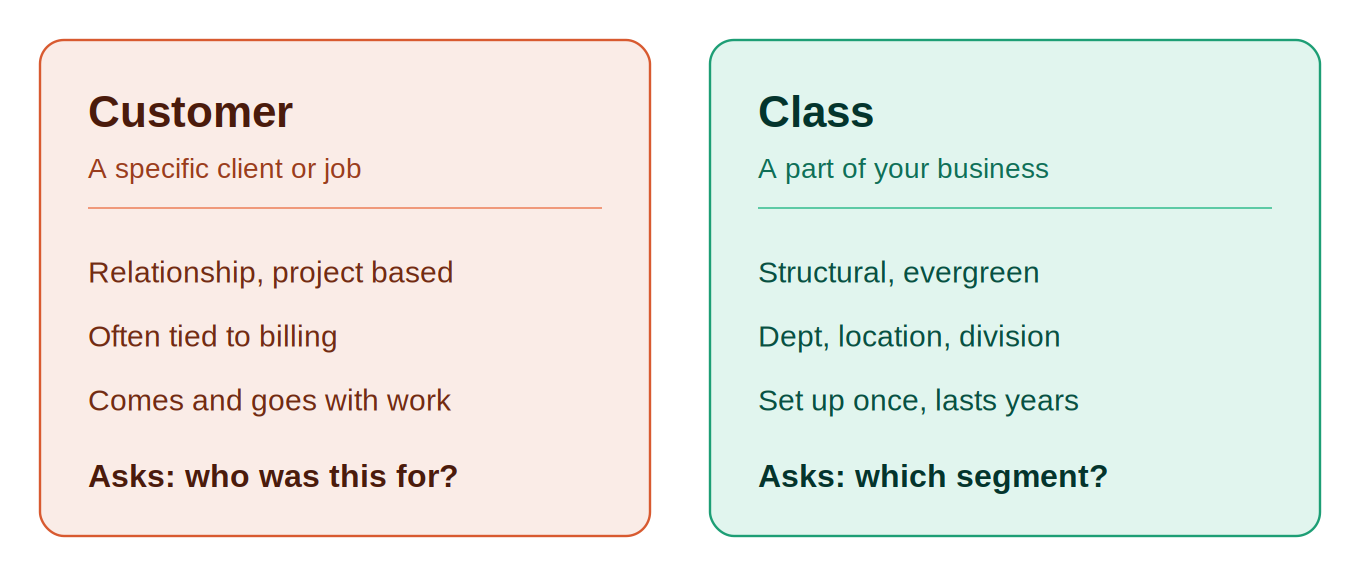
A customer tracks costs for a specific client or job. It's relationship- and project-based, and often tied to billing. A class tracks costs across a more structural, evergreen dimension like a department, location, or division. Many businesses use both: a class for the branch, a customer for the project. If you're trying to compare parts of your business rather than clients, see How to track expenses by class in QuickBooks.
How it works in Spendifique
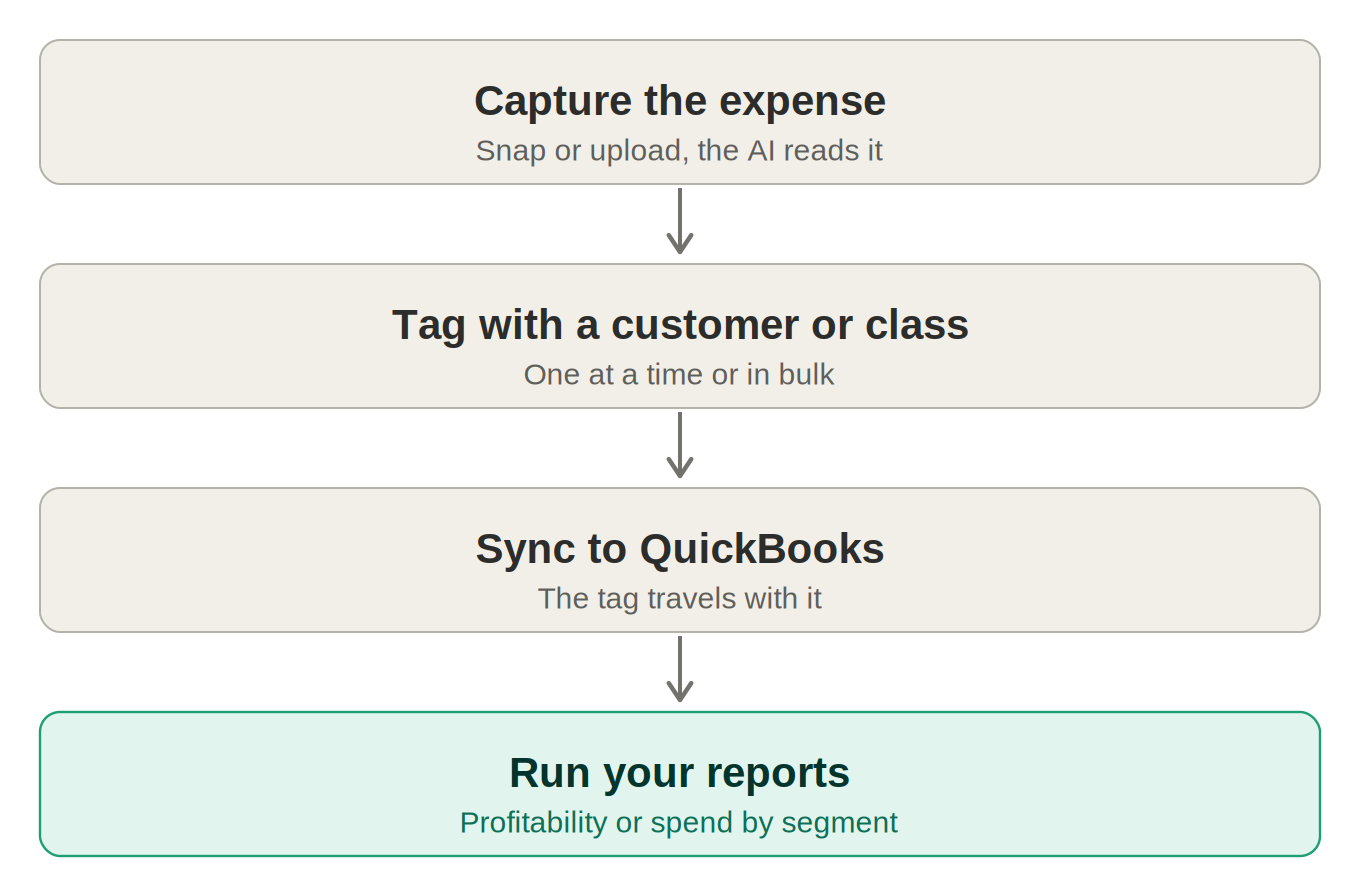
- Connect QuickBooks and import your existing customers, with no re-typing.
- Tag your expenses with the right customer, individually or in batch.
- Sync to QuickBooks with the customer attached.
- See the results. Profitability and billable costs land where they belong.
Already using Spendifique? You can switch this on in a couple of minutes. The setup steps are below.
Step-by-step: setting up Customers in Spendifique
1. Open Customers in Settings. In the left navigation bar, go to the Settings section and click Customers.
2. Turn on customers for expenses. On the next page, switch on the toggle to enable customers on expenses.
3. Import from QuickBooks. A button will appear in the middle of the page: Import from QuickBooks. Click it and follow the prompts to connect your QuickBooks account and import your customers.
4. Review your customers. Once the import finishes, your customers will appear on the Customers page.
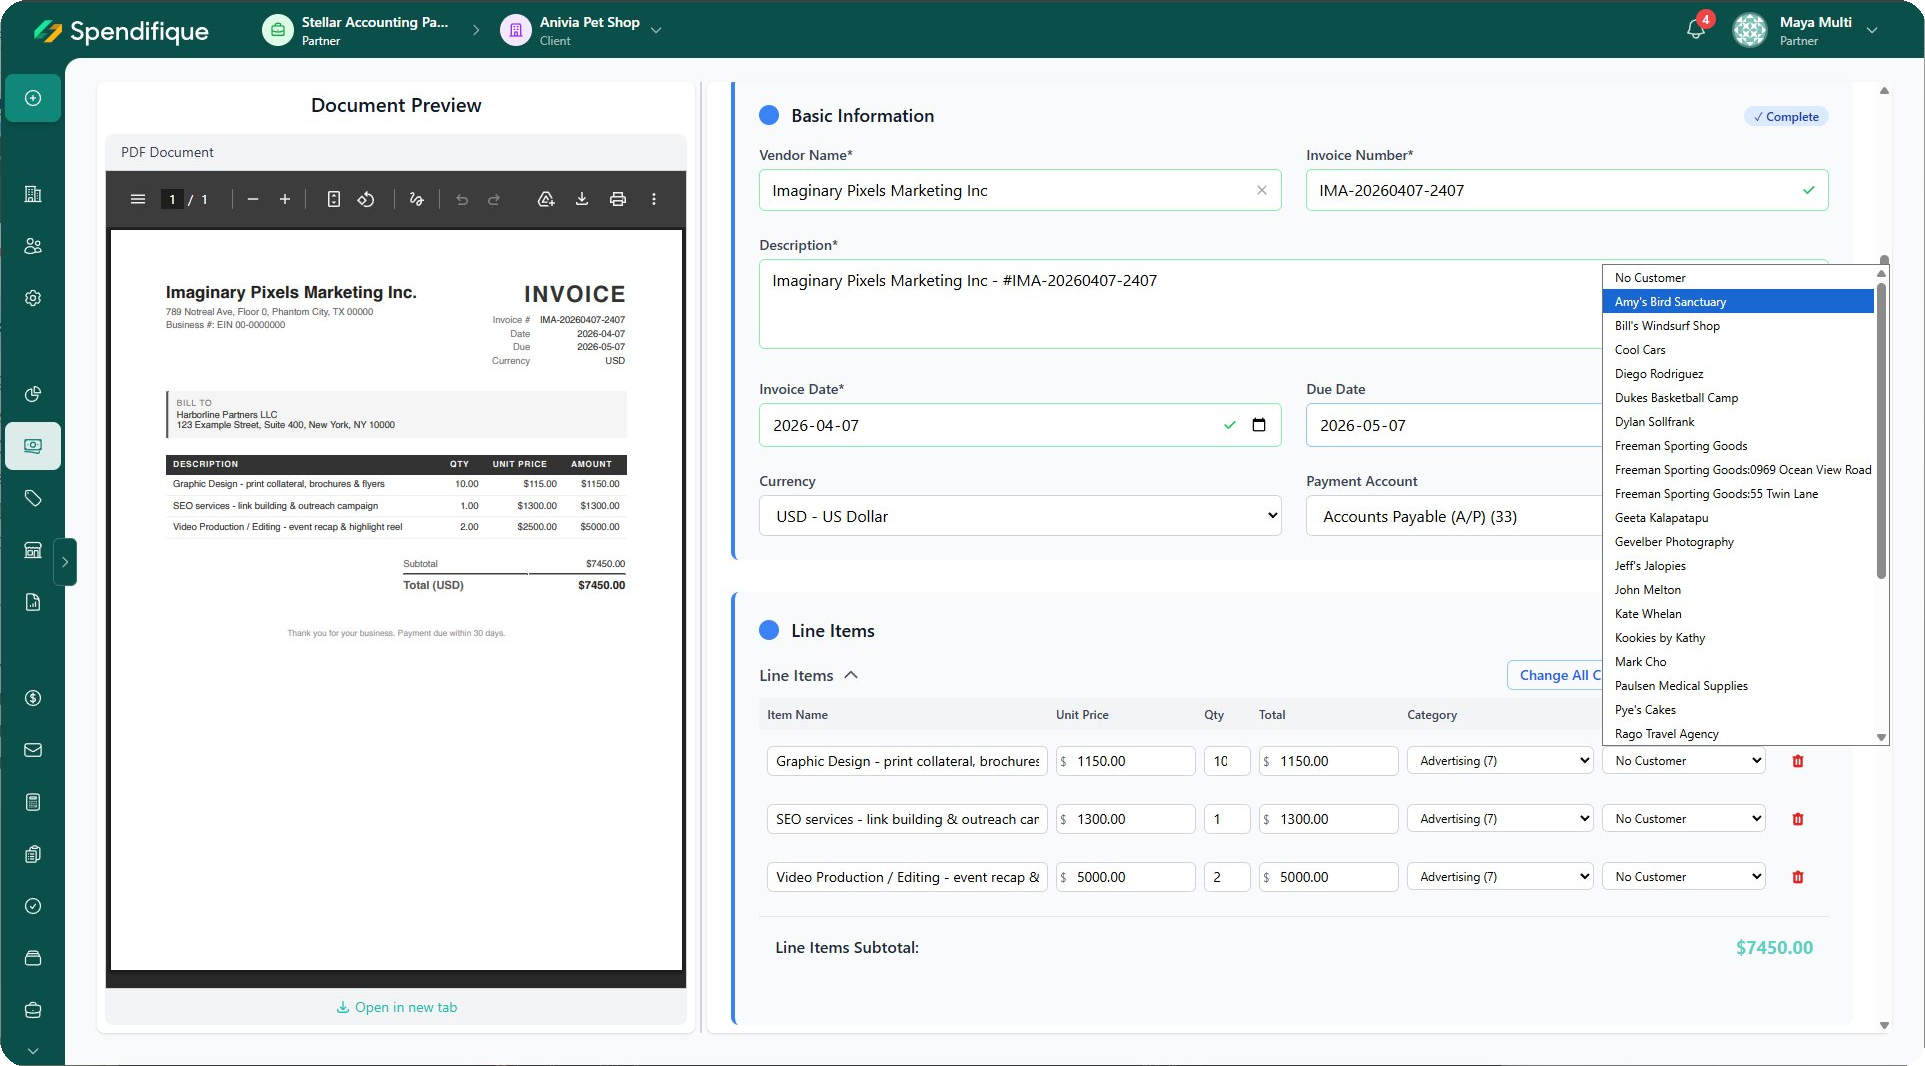
5. Add a customer to a single expense. Open the Expense Details page for that expense. The customer dropdown appears right beside the expense category dropdown. Select the customer and you're done.
6. Assign customers to multiple expenses in bulk. Click Expense in the left navigation bar to open the Expense List. Tick the checkboxes next to the expenses you want to update. A floating bar appears at the bottom of the screen. Click Customers, then choose the customer to apply to all selected expenses in the popup.
Frequently asked questions
What does it mean to track expenses by customer?It means linking each cost to the specific client or job it was for, so you can see profitability per customer and keep billable costs tied to the right client.
Can I assign a customer to multiple expenses at once?Yes. On the Expense List page, tick the checkboxes for the expenses you want, then use the floating bar at the bottom to apply one customer to the whole batch in a single click. It's the fastest way to tag costs in bulk or clear a backlog.
Do I have to recreate my customers in Spendifique?No. Spendifique imports them directly from your connected QuickBooks account, so they match what you already have.
Does the customer stay attached when the expense syncs to QuickBooks?Yes. The customer you assign in Spendifique travels with the expense, so it's already in place in QuickBooks.
What's the difference between a customer and a class?A customer is a specific client or job (relationship- and billing-focused). A class is a structural segment like a department or location. You can use both. See How to track expenses by class in QuickBooks.
Ready to see profitability by customer?
Tag every cost to the right customer once, and let it flow straight into QuickBooks, with no cleanup, no missed billables, and no profitability numbers that mislead you.
Start your free Spendifique trial and connect QuickBooks in minutes. Already a customer? Head to Settings → Customers to switch it on today.

.png)